I had the crazy idea to make viking shields for myself, some family and friends. I thought I would document how I did it and add some tips I learned.
The intent was to make something that was fairly accurate historically, but without too much cost. As a result I used a lot of modern materials such as plywood, zinc-coated nails, wood glue, and vinyl fake leather. The overall construction is pretty close to how the vikings appear to actually have assembled their shields, however.
I started off with two sheets of 4' x 8' 3/8" plywood. Most preserved shields from archeological sites appear to be made of wooden planks butted together and glued, but some evidence suggests the Norse were familiar with laminated woods too. In any case, plywood was cheap and easy. I cut two 32" diameter circles and one 28" diameter circle from each sheet using an electric jig saw. I then cut a 5" diameter hole in the middle of all but one of these. This is where the shield boss fits later on. In some cases, given the quality of my plywood, I needed to patch knotholes with spackle on the front side.
The most reliable way to trace a good circle was to cut a strip of 1/4" x 1 1/2" wood and then drill a hole near one end which fit over a nail in the plywood at the center of the circle. I then drilled holes at distances of 2.5", 14" and 16". Putting a pencil into these holes made it very easy to sketch out accurate circles of the appropriate size. I found that drawing the circles and also a line through the middle on what I used as the back of the shield helped a lot when attaching the handles.

The next step was to cut handles for 5 of the shields with bosses. I cut roughly 2" x 1" strips of wood on my table saw. Furring strips also work nice; they're the same size and are precut. I made these 4" shorter than the diameter to allow 2" on each end. For four of these I used the jig saw to narrow down the handle over the 5" section that overlaps the whole in the middle. I nailed these to the plywood from the front side after first drilling pilot holes through the plywood and handle, and then clenched the nails over while laying the front on the concrete in my garage. I used four nails per handle one about two inches from each end and then another two about two inches from the hole in the middle of the shield.
 |
| 28" shield with handle attached |
Next, I glued some fabric to the front of the shield. The vikings used linen; sometimes more than one layer, apparently to help hold the wooden planks together better. I bought the cheapest material I could find ($1.99 per yard muslin). For my first attempt, I used some spray on adhesive, but for the others I just used wood glue. The wood glue gave better results, I think. I wrapped the fabric around the back and either tacked it in place with a staple gun or with more wood glue on the back. Again, the wood glue gave better results and the fabric was stiffer. I ended up painted the tacked shields over with glue on the back anyway.
In hindsight, I would've been better off just cutting the fabric right at the edge of the shield so none of it folded over to the back.
One trick I discovered was that cutting the excess fabric in 3 or 4 inch intervals and then wrapping it to the back greatly decreased the number of folds on the back side. This is essential for the false leather shield which must fold over to the back to look nice around the edges.
Once the glue was dry I cut out the fabric over the hole.
 |
Two shields with handles and fabric attached
The one on the left used spray adhesive, the one on the right used wood glue. |
For one shield I glued on some false leather embossed vinyl to make it look the the shield was covered in leather. In this case the fabric was much thicker and the cuts were really helpful in stapling the vinyl to the back side.
 |
Back of the shield showing how the handle is attached
I did not cut a narrower handhold on this one. |
 |
| Detail showing how cutting the fabric reduces folds and bumps |
After this, the next step was to paint the fronts of each shield (except, the leather one, of course). For this I used acrylic craft paint. I chose some geometric designs, rather than overtax my artistic skills by trying to paint people or animals. I used several coats of paint to make sure the wood and fabric colors did not show through. A Google search for "viking shield designs" turns up all sorts of ideas, if you don't have any of your own.
 |
| Two of the designs I chose painted on the shields |
When this was done I painted over the above two shields with clear polyurethane for protection, in case they ever get taken out in the rain. For a third shield I waited to put the rawhide edging on before covering with polyurethane, since I wanted to protect the rawhide as well. For the above two shields, I used strips of false leather vinyl for the edges, so the polyurethane came first.
To prepare the vinyl strips I cut 3 to 4 inch wide strips each a yard long. I then folded them over about one-third and glued them with wood glue. I clamped the folds with binder clips until the glue was set enough to hold, and then sat a couple of heavy flat boxes on top and let them dry overnight.
 |
| Strips of vinyl edging being glued |
Vikings edged their shields with real leather or rawhide. So I did one shield with rawhide edge. I bought a 22" rawhide chew and soaked it in the tub to soften it. Then I untied it, laid it out somewhat flat and cut roughly 2" strips. If I were doing this again, I would buy a piece of flat rawhide from a craft store instead, even it it cost a bit more; it would be much easier to cut into consistent strips. Wet rawhide stretches nicely, so I clamped it into place with binder clips and let it dry for a day or two. Once it is dry it's very hard and doesn't need the clamps any more.
 |
Remainder of rawhide after edging one shield
A rawhide chew is hard to work with because even when wet it doesn't lay flat and getting consistency in the width of the strips when you cut them is a bit of a challenge. |
 |
| Shield with rawhide edging clamped in place |
For both the false leather and rawhide I tacked the edging into place using #14 size carpet tacks. The false leather had bulges and required more tacks than the rawhide. I pounded the tacks through with wide spacing first to get everything in place and then went back and put more tacks in between. The tacks were long enough to go through the edging on both sides and the wood in the middle. If I had used thicker plywood I might have needed larger tacks, however. I clenched the nails on the backside to hold the edging in place.
 |
| Shield with rawhide tacked in place. |
 |
| Tacks widely spaced at first |
 |
| Then filled in with more tacks to make things even |
After this wrapped the hand grips with some swede leather to make them easier to grasp. I tacked these in place with either a staple gun, or some very short carpet tacks.
 |
| Finished edging with tacks about an inch apart |
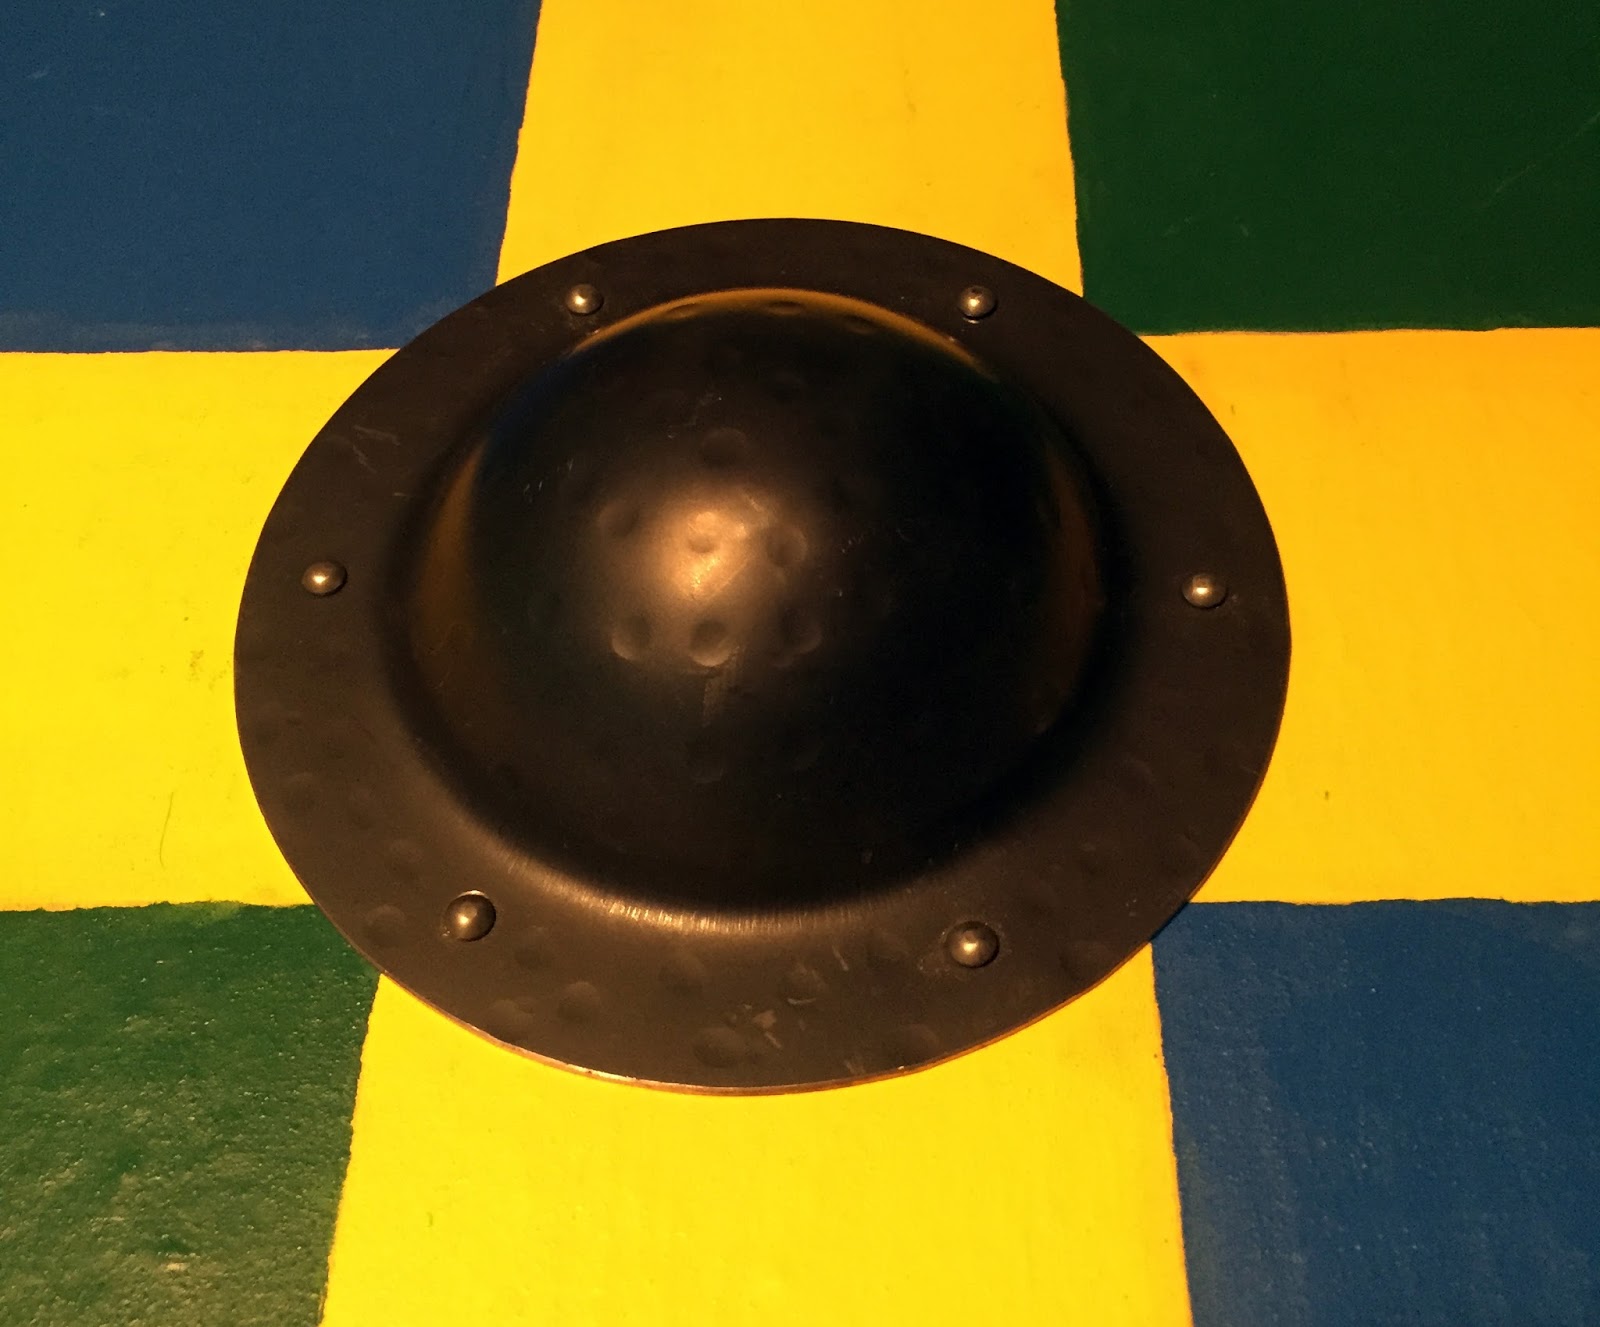
The final stage was to put the shield bosses in place. I ordered mine online from Amazon. I got four with blackened hammered steel and one with bright stainless steel for the false leather shield. To attach the bosses to the shields I bought a box of 3/16" diameter rivets with a 5/8" shaft. This was barely long enough and I would recommend at least 3/4" for 3/8" thick plywood, if not longer. I centered the boss on the front side as accurately as I could, making sure that none of the holes were sitting over the handle. Then I drilled one hole into the shield through the hole in the steel boss. I riveted this into place with a ball-peen hammer, and then centered the boss again to drill a second hole and riveted that. Finally, I drilled holes for the remaining 4 rivets and hammered them in place.
 |
| Shield boss after attaching rivets |
 |
Rivet on the back side
I would like to have had longer rivets and then I could have put a washer down and riveted over it, but this seems to work pretty well, too. |
I made a mistake on my first shield and cut a 5.5" circle. The holes from the shield boss were too close to the central hole and attaching the boss was tricky.
As a final touch I wrote the viking names of the shield recipients/owners in Younger Futhark runes on the handles. I can't vouch for the spelling, but I think it's pretty close.
 |
| Rikhard Rikhardsson (Richard, Son of Richard) |
 |
| "Swerdbrotsyar" (Sword Breaker) |
For my own shield (#1 below) I wanted to add a strap in case I decide to carry it over my shoulder as part of a costume. I used an old belt, which I cut to measure. I tacked the buckle end into the bottom of the handle on the back side, and the end with the holes into the top of the handle. I used three carpet tacks on each end to hold securely. I was not to worried about the bottom end, where the stress pulls perpendicular to the nails, but on the top the stress would tend to pull the nails out. So I cut a strip of sheet metal and wrapped it over the nail heads and then tacked it into the side using two more carpet tacks.
 |
| Shield with strap attached |
Here are photos of the finished full-sized shields:
How Other People Have Done It


No comments:
Post a Comment